
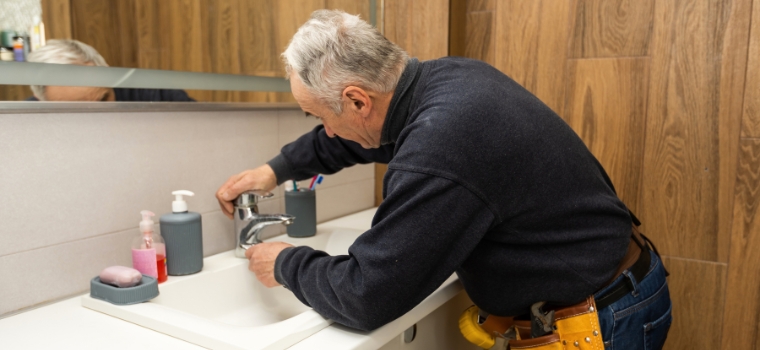
A leaky tub faucet is more than just an annoyance. It wastes water, increases your utility bills, and can eventually damage your bathroom walls or flooring if left unchecked. Fixing it might sound complicated, but with the right steps and tools, anyone can handle this home repair. This article will walk you through each stage of the process, helping you understand exactly how to fix a leaky tub faucet. In this blog, you’re going to learn the steps to fix a leaky tub faucet, understand the common causes behind the issue, explore the tools you’ll need, and get practical tips to prevent future leaks.
Some Common Reasons Behind a Leaky Tub Faucet
Understanding why a tub faucet leaks is the first and most important part of fixing the problem. When you identify the cause correctly, the repair process becomes much more efficient and effective. Here’re some causes of a leaky tub faucet:
| Common Reason | Description |
|---|---|
| Worn-out Washer | This component sits between the valve seat and handle stem. Over time, friction causes it to degrade. |
| Damaged O-ring | A small rubber ring that can crack or flatten, usually causing water to leak around the handle area. |
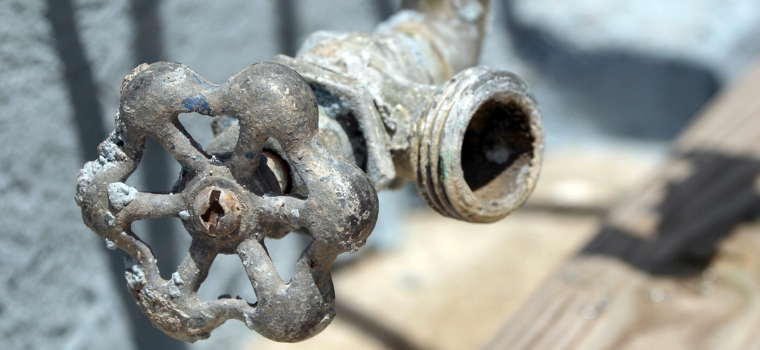
| Corroded Valve Seat | Mineral buildup or rust can wear out the metal seat that connects the faucet and spout. |
| Loose or Broken Parts | Components like nuts or faucet stems may loosen over time or break under wear. |
| Faulty Cartridge | In single-handle faucets, a worn or misaligned cartridge can cause continuous dripping. |
By recognizing these typical issues, you can move forward with the repair process more confidently and ensure long-term results.
Related blog: Tips to Prevent Clogged Drains in Showers
Required Tools to Fix a Leaky Tub Faucet
Fixing a leaky tub faucet doesn’t require a toolbox full of advanced equipment, but using the right tools for each task is essential. A clear understanding of what each tool does can make the repair smoother, safer, and more efficient. Here’re some of the important tools with their purposes which are required to fix a leaky tub faucet:
- Flathead Screwdriver
Removes decorative caps and loosens certain screws. - Phillips Screwdriver
Unscrews most handle and escutcheon screws. - Allen Wrench
Loosens hex screws on some cartridge-style handles. - Adjustable Wrench
Removes faucet stems or cartridges with varying sizes. - Faucet Washer
Kit Provides replacement washers or O-rings as needed. - Plumber’s Grease
Lubricates components for smoother reassembly and longer lifespan. - Old Rag or Towel
Protects surfaces and keeps parts organized. - Bucket
Catches residual water and prevents mess during disassembly. - Replacement Cartridge
Required for cartridge-style faucets to stop leaks properly.
Quick Tip: Lay removed parts on a towel in the order you take them out. This makes reassembly faster and error-free.
With these tools and materials at your side, you’ll be well-prepared to carry out a proper faucet repair without any unnecessary interruptions.
Step-by-Step to Fix a Leaky Tub Faucet
Repairing a leaky tub faucet involves a series of simple but precise steps. When followed in order, these steps will help you stop the leak effectively without causing additional plumbing issues.
This section outlines each step clearly to make the process easy, even if you’re not an experienced DIYer.
1. Shut Off the Water Supply
Before starting any repair, it’s critical to stop the water flow to avoid leaks, spills, or flooding.
- Locate the shut-off valve near your bathroom or basement.
- Turn the valve clockwise to close it completely.
- Open the tub faucet to drain out remaining water.
- Place a bucket below the faucet to catch any drips.
Once the water supply is off, you’ll have a clean and dry work area to safely proceed.
2. Remove the Faucet Handle
Taking off the faucet handle gives you access to the internal parts that may need repair or replacement.
- Look for a screw on top of the handle or behind a decorative cap.
- Use a flathead screwdriver to gently pry off the cap if present.
- Unscrew using a Phillips screwdriver and pull off the handle.
- If the handle is stuck, a handle puller tool will help remove it without damage.
With the handle removed, you’re one step closer to exposing the faulty components inside.
3. Detach the Escutcheon Plate
Removing the escutcheon plate uncovers the stem or cartridge housing inside the wall.
- Use a screwdriver to loosen and remove the escutcheon screws.
- Gently pull the plate away from the wall.
- Wipe away any debris or buildup from behind it with a soft cloth.
Now that the wall area is clean and accessible, you can safely work on the valve mechanism.
4. Identify and Remove the Faucet Stem or Cartridge
The stem or cartridge is often the main source of a leak, so this part must be carefully removed.
- For compression faucets: Use an adjustable wrench to unscrew and remove the stem.
- For cartridge faucets: Use an Allen wrench to remove the retaining clip and slide out the cartridge.
- Examine the removed part closely for wear or damage.
Once the internal part is out, you can accurately decide which components need replacement.
5. Replace Faulty Components Inside the Faucet
This is where you fix the real issue by installing fresh washers, O-rings, or cartridges.
- Check all rubber washers and O-rings for signs of cracking, flattening, or wear.
- Replace damaged parts using items from your faucet washer kit.
- Lubricate all replacement parts with plumber’s grease to ensure smooth fitting.
- If you’re using a new cartridge, make sure it matches your faucet model and is aligned properly.
With new parts installed, the core problem causing the leak is now resolved.
6. Clean and Prepare the Faucet Area
Before reassembly, clean the internal surfaces so everything fits securely and operates smoothly.
- Use a cloth to wipe around the valve housing and faucet opening.
- Remove any corrosion, mineral buildup, or debris with a vinegar-dampened cloth.
This cleaning step ensures that reassembled parts won’t get blocked or wear out prematurely.
7. Reassemble the Faucet Parts
Now that all repairs are complete, it’s time to put everything back where it belongs.
- Reattach the escutcheon plate to the wall and tighten the screws.
- Slide the faucet handle into place and secure it with its screw.
- Snap the decorative cap back on top if it was removed earlier.
A careful reassembly keeps the faucet tight, aligned, and visually clean.
8. Restore Water and Test the Faucet
Final testing helps you confirm the leak is fully resolved and the faucet functions normally.
- Turn the shut-off valve counterclockwise to restore water flow.
- Turn the faucet on and off multiple times.
- Look closely for drips from the spout or around the handle.
If there are no leaks, your tub faucet is successfully repaired and back in perfect working condition.
Fixing a leaky tub faucet may seem intimidating at first, but when broken down into clear steps, it becomes a manageable task. By following these eight steps carefully, you not only fix the issue but also improve your confidence in handling basic plumbing maintenance at home.
Related blog: How to Increase Water Pressure in Home?
Fixing Persistent Leaky Tub Faucet Issues
Even after replacing worn-out parts, you may still notice water dripping from your tub faucet. When basic repairs don’t fully solve the problem, there could be underlying issues that require a more detailed inspection. This section outlines common reasons your leaky tub faucet may persist and how to resolve them effectively.
If your faucet continues to leak even after a careful repair, you might be dealing with deeper mechanical or installation-related faults. Understanding these problems is the key to fixing the issue once and for all.
| Issue | Likely Cause | Detailed Solution |
|---|---|---|
| Leak persists after part replacement | Incorrect installation or wrong part size | Even a new cartridge or washer won’t work if it doesn’t match the faucet model exactly. Check that the replacement part matches the original in size, thread type, and seating depth. If the part is slightly off, it won’t form a proper seal and the leak will continue. Carefully reinstall the part while following the manufacturer’s specifications to ensure it fits tightly and sits in place. |
| Corrosion inside valve | Mineral build-up or aged metal | Over time, hard water deposits or rust can damage the valve seat inside the faucet, making it impossible for new components to seal correctly. If you see signs of green or white scaling, soak a cloth in white vinegar and hold it on the affected area for 10–15 minutes. Use a soft-bristled brush to scrub off the buildup. If corrosion is too extensive, replacing the valve seat or the entire valve body may be necessary. |
| Low water pressure | Sediment blockage in lines | Sediment and debris can collect in your water supply lines, especially if you have older plumbing or live in a hard water area. This buildup may cause pressure fluctuations, which can impact how tightly the faucet closes. Shut off the water supply, remove the faucet, and briefly turn the valve back on to flush the lines. Let the water run for a few seconds into a bucket to carry out any debris. Then reinstall the faucet carefully and test again. |
When simple part replacements fail, identifying and addressing these deeper issues is essential. Whether it’s a mismatched cartridge, corrosion, or pressure blockage, resolving the actual cause ensures your tub faucet stays leak-free for the long term.
Preventive Maintenance Tips for Leaky Tub Faucets
Proactive maintenance helps extend the life of your faucet and avoids frequent repairs. By building a few simple habits into your routine, you can reduce the chances of another leak and keep your tub faucet working smoothly.
Regular attention to your faucet, even when it seems fine, can prevent many common issues from developing. These habits require minimal time and effort but offer long-term benefits.
Best Practices to Prevent a Leaky Tub Faucet
- Avoid Over-tightening Handles
Turning the faucet handle with too much force wears out internal components faster. Just shut it off firmly, not forcefully. - Watch for Early Warning Signs
Loose handles, dripping sounds, or slower water flow often hint at future problems. Don’t ignore these subtle alerts.
Maintenance Routines That Make a Difference
- Replace Washers or Cartridges Periodically
Even if there’s no visible damage, components like washers and cartridges degrade over time. Replacing them every few years can prevent surprise leaks. - Clean the Faucet and Parts Regularly
Wipe down your faucet with a mild cleaner once a week. Once a year, remove the handle and escutcheon to clean any sediment or mineral buildup inside.
A consistent and simple maintenance routine will help you avoid repeated leaks, improve faucet longevity, and minimize repair costs over time.
You may also read: Ultimate Guide to Becoming a Professional Plumber
Final Thought
Fixing a leaky tub faucet is not just about stopping a drip, it’s about saving water, protecting your home, and maintaining functional plumbing. With the right tools, a clear step-by-step process, and a little patience, you can handle this task confidently. Whether you’re replacing a worn washer or cleaning out corrosion, each step plays an important role in the outcome. And by following simple preventive tips, you can avoid future leaks altogether. Addressing the issue promptly not only restores your faucet but also adds to the long-term health of your bathroom plumbing.

